Pages

Sunday, September 11, 2011

Sunday Breakfast Sando


I love breakfast! Being vegan it can be hard to go out to breakfast and eat anything interesting. So I try to make vegan versions of some classic restaurant breakfasts. This one is a really filling and healthy way to experience something you would get from your local drive through but 100% better for you and tasting. I think you could morph this sando however you want, if you like soysage instead of faken or some veggies or whatever you like. The real gem in this sando is the tofu and using really good English muffins! I love a great English muffing, something whole wheat or flax, the more nutritious the better. The tofu in this recipe is key, I use nutritional yeast, this looks a lot like fish food but has a really nice cheezy taste to it, you can find it at whole foods (I use it in my mac and cheeze recipe and others on my blog)  I made enough to make 4 sandos so I will make the recipe according to that. They make really good leftovers.
What do you like to eat for breakfast?

Ingredients
4 - English muffins (use something really grainy and good)
4 - 1/2 in slabs of extra firm tofu (cut them off the block into slabs)
1/4 cup soy sauce
1/4 cup nutritional yeast
8 strips of faken bacon
2 tablespoons grapeseed oil
1/2 (or so) Daiya Cheddar shred's
earth balance buttery spread (optional)

Directions
  • Cut the tofu into slabs, place the tofu on a plate and pour the soy sauce over them.
  • sprinkle the nutritional yeast over the tofu, make sure you get both sides, this will make the soy sauce and nutritional yeast into a paste, coat both sides.
  • in a skillet heat 1 tablespoon of the grapeseed oil and begin to brown up the bacon.
  • in another skillet heat the other tablespoon of grapeseed oil and bring to medium high heat, when the oil is hot toss in the tofu
  • fry the tofu until both sides are golden brown
  • brown the faken then transfer to a plate
  • toast the English muffins
  • now build the sando, earth balance if you want on the English muffin, stack 1 tofu slab, 2 strips of fakon and top with a little Daiya Cheddar.
  • Now you nosh

Wheat Berry Salad with Faken Bacon


This recipe came to me from a friend and blog follower, when I got the recipe it did call for regular bacon of course I just swapped it for vegan bacon. I made this salad about 3 weeks ago and I took it for lunch for a few days and since then I have made another batch to take for lunches. It is so filling with the wheat berry's and I love the fresh lemon and parsley flavor. This is a great make ahead and keep it on hand I would say its good for a few days in the fridge, if it lasts that long! I also think it would be a great dish to take to your next Sunday football potluck. I am sure at some point this season I will bring this dish and its sure to be a hit! Give this one a try, if you are not sure about the vegan bacon you can leave it out or use what ever you want. If you try this one let me know how it goes I love to know you all are trying the recipe's I post! Also a big thank you to Tricia for the recipe!

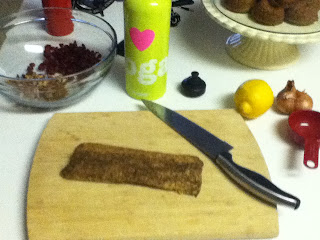
this is the fake bacon - it is yummy!

Dressing
 
cherries and toasted pecans

I am so bad at taking pictures! Sorry!


Ingredients

  • 1 cup wheat berries
  • Kosher salt and black pepper
  • 1/2 cup pecan halves
  • 1 package Organic Smoky Tempeh Strips - http://www.lightlife.com/product_detail.jsp?p=tempeh_smokystrips
  • 1/2 cup dried cherries
  • 1/2 cup fresh flat-leaf parsley
  • shallots, thinly sliced
  • 2 tablespoons extra-virgin olive oil
  • 2 tablespoons fresh lemon juice
  • 1Tablespoon Grape Seed Oil

Directions

  1. In a large pot, combine the wheat berries, 4 quarts water, and 1 teaspoon salt and bring to a boil. Cook until tender but still slightly chewy, 50 to 60 minutes. Drain and rinse with cold water to cool. Transfer to a large bowl.
  2. Meanwhile, heat oven to 350° F. Spread the pecans on a rimmed baking sheet and bake, tossing occasionally, until fragrant and toasted, 6 to 8 minutes. Let cool, then roughly chop.
  3. Meanwhile, cook the Tempeh in a large skillet with 1 tablespoon of Grape Seed Oil over medium-high heat until crisp, 6 to 8 minutes.  When cool, crumble and add to the wheat berries, along with the pecans, cherries, parsley, shallots, oil, lemon juice, and ¼ teaspoon each salt and pepper. Stir gently to combine.

Oatmeal Carob Chip Cookies

This recipe is one that my sister Sallie makes for her family all the time, I made a few changes to it to make it vegan (Sallie makes them vegan some of the time, don't tell her husband) I have been in the mood for cookies for what seems like weeks now and so I am happy that last night I finally made these little gems! I have to say that in the process of being vegan I have really learned some crazy stuff. For example did you know that not all sugar is vegan??? I know I was shocked at first too, what could possibly be un-vegan about white sugar well....... I will not disclose that info but I will attach this link and if you want to know then you can click and learn, you choose http://www.vegan.org/FAQs/index.html
 But enough of that lets talk about Carob!!! This stuff is amazing if you have not tried it I will invite you to get some from your local Whole Foods bulk bins, that way you can just get a few to try at first! I did not take pictures of this because I was lazy but I am sure you have all seen a cookie before :) Just make it and I am pretty sure you will like it!


Ingredients
  • 1/2  cup earth balance, softened
  • 3/4  cup firmly packed brown sugar
  • 1/2  cup granulated Vegan sugar
  • 2  servings of egg replacer
  • 1  teaspoon vanilla
  • 1-1/2  cups all-purpose flour
  • 1  teaspoon baking soda
  • 1  teaspoon ground cinnamon
  • 1/2  teaspoon salt
  • 3   Oats (quick or old fashioned, uncooked)
  • 1  cup carob chips


Preparation
Heat oven to 350°F. In large bowl, beat earth balance and sugars on medium speed of electric mixer until creamy. Add egg replacer and vanilla; beat well. Add combined flour, baking soda, cinnamon and salt; mix well. Add oats and carob chips; mix well.
Drop dough by rounded tablespoonfuls onto greased cookie sheets.
Bake 8 to 10 minutes or until light golden brown.

Monday, August 8, 2011

BLT Kale Salad

             
This Salad is so good and takes little effort and will be a big hit for your vegan and non vegan friends! I took it too a BBQ a few weekends ago and it got rave reviews, it is so simple and the flavors of the Smokey Tempeh with the tangy dressing are out of this world! I love Kale so much, it is quickly becoming my favorite thing to eat! The trick with Kale is that you need to pre-dress it and let it hang out a bit before you serve it. Kale has a natural woodiness that people are a little scared of and pre-dressing softens it and makes it super good! Give this one a try and your next summer get together and see what people think, no need to tell them its Vegan! They will be liking there plates before you have a chance to tell them what is in it!
Give this one a try and let me know how it goes.

What other salad's are you eating this summer?
Tell me what you are reaching for in the lettuce department!

Salad
1 Head  Kale
1 Tablespoon of Grapeseed Oil
1 Package Lightelife Organic Smoky Tempeh Strips (click on the link to see what this is)
1 Tub of  Sweet Cherry Tomatoes

  • Cut the kale off the woody stem, I do this by laying the kale flat to the rib is at the top of the cutting board and the leafs are at the bottom, run your knife along the rib and it will cut away from the stuff you want to keep (you can save the woody stems for juicing) wash and dry your kale leafs
  • heat the grapeseed oil on medium high heat in a frying pan
  • cut the Temphe Strips into small chunks (think Bacon chunks)
  • fry up the Thempe Strips in the Grapeseed oil until golden brown and crispy, drain on a paper bag (or whatever you have, I am paper free at my house)
  • slice the Toms in half
  • Make your dressing
Dressing1/4 Cup Vegenaise Mayo
1 tsp Dijon Mustard
1/4 tsp Salt
1 tsp Lemon Juice
2 tsp Vegan Worcestershire (the normal kind is made with anchovies)
Freshly Ground Black Pepper
  • I just put all the dressing ingredients together in a mason jar, put the lid on and give it a shake
  • Now just put everything in a big salad bowl, you need to dress the salad and cover it
  • place it in the fridge for about 30 min (so the kale softens a little)
The eat!!!!! This will be your new favorite for sure!


Sunday, July 31, 2011

National Cheesecake Day!

In honor of National Cheesecake day I have made a delish Vegan Cheesecake. As always I have put my own spin on a classic. I used Tofutti bran "Cream Cheese" I love it, I think in a blind taste test you really could not tell the difference. I am excited at how good it turned out! I brought it to my friends 40h birthday bash and it was a hit, I will make it again very soon. I only regret that I did not take a picture of it before it got cut and every last piece gone :) It is a good feeling when you bring something to a party and people like it!
let me know what you think, what is your favorite cheesecake recipe? I am up for the challenge, send me your favorite Cheesecake recipe and I will veganize it! Lets see what you come up with :)


Graham Cracker Crust

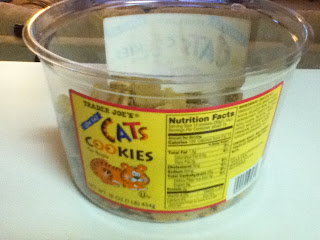
I used the Cat cookies from Trader Joe's (half of the tub)
1/2 cup of Earth Balance vegan butter (this is the very best)

heat the oven to 350
Melt the butter then put the cat cookies in the food processor and pulse and stream the butter in.
its done when it has a wet sand like consistency.
press the cookie mixture into a spring form pan, build up the sides a little bit more with your fingers.
bake for 8 minutes, take it out and make the filling.
(don't be surprised at how good the cat cookies are, I had them with some coffee)


Tofutti Cheesecake


Preheat oven to 350 degrees
Blend together:
3 tubs of Tofutti plain cream cheese (room temp)
1 cup of sugar (I used raw, use whatever you have)
1/4 cup of lemon juice
2 tsp of vanilla
1/4 whole wheat flour (this will give it a really nice nuttiness)

reserve the flour, Mix everything  else until creamy.
Fold in the whole wheat flour
Pour into  graham cracker crust  into the spring form pan.
Bake for 30-40 minutes or until just brown.
Now here's the hard part: you have refrigerate the cheesecake for at least 8 hours.
Top with fruit or eat plain.

Sorry no photos but trust me it was really good, even my non vegan friends went back for a second piece :)

Stuffed Squash Blossoms

A nice trip to the Scottsdale Farmers Market (located on Shea & 93rd st) I found some beautiful Squash Blossoms. I have never cooked with them before but I have always seen how nice they looked on a plate. So I had made a batch of cashew cheeze so I figured I would fill the blossoms with the cashew cheeze. This was a little complicated because I have a fairly minimalist kitchen so I was without a pastry bag to pipe in the filling. Using my creative skills from my Mother I just used a plastic ziploc bag and cut a hole in the corner creating a make shift pastry bag. This recipe was a lot of fun and I served it with a very simple and light pasta dish. I will post both recipes below.
I learned that the farmers market is such a great place to find fruits and veg that you may never see in your local chain stores. Find your local farmers market and try some new foods, most of the time the farmers will have great suggestions on how to best prepare their foods. It is also a really great way to support you local farmers that are not polluting your food with chemicals and who knows what else. (oops I started to step up onto my soap box)

Do you have a farmers market that you love? Where is it? Why to you like it?

Crispy Stuffed Squash Blossoms

Ingredients

Squash Blossoms
Egg re-placer (water to activate)
Cashew Cheeze (recipe below)
Panko Bread Crumbs
S & P to taste
Oil to fry in (I like grapeseed oil)

Directions

First wash the squash blossoms and let them dry


Then begin to fill the blossoms with the cashew cheeze, do not over fill them. pipe in a thin line of cheeze


Next get 2 plates, one for the egg re-placer and one for the panko. season the panko with S & P


Next roll the stuffed blossoms in the egg replace then into the panko, then repeat one more time. you may need to press the panko onto the blossom a little.
Now heat the oil in a frying pan at about medium high heat, toss in a panko crumb to test the oil if it sizzles its ready to fry.
Fry them up till they are golden brown (this picture is funny) :)
Then drain them on to a paper bag with a cookie sheet underneath it (this is a great way to use all the paper bags you may have lying around)
That's it! now let them cool a little and enjoy! they have a really nice crispy outside and a nice savory, creamy inside. Give these a try they are a nice treat from your farmers market!
This is not the best picture but you get the idea. I hope this inspires you to try something new! See below for the pasta recipe and the cashew cheeze.


Cashew Cheeze

1 cup raw unsalted cashews
2 cups fresh water
1 clove garlic
S&P to taste

soak the cashews for at least 2 hours in the fresh water
drain the cashews, save the liquid
put the cashews into the food processor with the garlic and S&P.
let the processor fun and stream in the water until you get a hummus like consistency
refrigerate and then serve
****great on crackers, or thin it with some more water or veggie stock and turn it into a creamy pasta sauce with out the guilt!


Simple Light Pasta

1 package whole wheat pasta (any type you like)
5 cloves of garlic chopped (very small)
1/2 cup or more of really good EVOO - plus a splash for when you cook the garlic
1 bunch of flat leaf parsley, chopped up
1 teaspoon crushed red pepper flake (optional if you like the heat, and you know I do)
S & P to taste

Cook up the pasta according to the directions
In a small satay pan cook the garlic and crushed red pepper with a splash of EVOO
once the garlic is soft and toasty (not burned, be careful)
toss the pasta with the garlic and red pepper, add the EVOO and parsley
toss to combine everything then season with S&P
its really that easy! simple and delish

Sunday, July 10, 2011

Sunny Dill Cheeze and School

I am so excited to start school on Monday, oh wow that tomorrow morning! I am embarking on a journey to become a Holistic Wellness Counselor, I am attending school through the Institute for Integrative Nutrition. I am looking forward to learning and absorbing everything so that I can help others in there journey.
     One of the things I have always had an interest in is Raw eating, I have taken some classes and met some very brilliant people that are experts on Raw food. So in my own personal voyage to learn more about "cooking" Raw I am starting small with dips like this Cheeze spread. I am a really big fan of cashew cheeze (I make it often) so I was excited you use that same method with a summertime staple, Sunflower seeds! This version can be morphed to any ingredients you have on hand, you could change out the seeds for any other seeds or nuts. also you can change out the dill for what ever fresh herb you have, I love Thyme and Basil as well.

                                          I served it here as a spread on crackers with cucumber
Ingredients:

1 cup raw unsalted sunflower seeds
2 cups water
1 lemon juiced
1 table spoon fresh chopped dill
S&P to taste

First soak the sunflower seeds in the water for at least one hour.  After the seeds have soaked strain them and save the soaking water. Put the seeds in your food processor, add the juice of one lemon and let her rip, slowly stream in the soaking liquid until you get a smooth consistency (think natural peanut butter) then add your dill and S&P and pulse the food processor until it gets combined. Place the mixture in a glass jar and store in the fridge. I like to let it chill for about 30 min then place it on your favorite cracker or on a cucumber slab! There are some really wonderful Raw crackers at your local Whole Foods, in fact did you know they have a Raw food section? Next time you are doing some shopping check it out! Or as always check your local farmers market for a Raw vendor and make them your new BFF.
How about you? Have you had any experience with Raw eating? Want to learn more? Look around for a free class in your area, they are not as hard to find as you may think!

Bruschetta and Summer

Sometime is in full swing here is Phoenix, it is so hot and my desire to turn on the oven is not happening. I want to focus this summer on using more raw and fresh ingredients. It feels like the body's natural desire is to have cooler foods in the summer, less effort to process and eating raw is a super nutritious way of eating. I am not saying this is a raw dish but there will be some raw food to come on my blog. For now I am just so excited about this Bruschetta, I love bread!!!  I will find any excuse to buy a beautiful fresh loaf of crusty goodness. The other day at the store I got some really great looking cherry tomato's, I thought that the little bites of bright freshness would be perfect for this dish. Yes this is a quite simple dish but I am struck with the punch of flavor and the simplicity of fresh ingredients, I made this a meal with a glass of wine. This is a great dish to make ahead and take to party's, picnics or just to have on hand for a few days to snack on (if it lasts that long)


Bruschetta
2 cups chopped fresh Tomato's (i used cherry's for this one but use any great looking cherry at your market)
2 large cloves of fresh garlic chopped
15 fresh basil leaves chopped
1/2 cup to 1/3 cup really good olive oil
1 table spoon of Balsamic Vinegar
S&P to taste (as always I go heavy on the pepper)

I may have gone heavy on the garlic but you can back off if you don't want garlic breath.


That's it, toss it all in a bowl and mix, I like to let it sit in the fridge for 30 min or so to let all the flavors mix and get friendly. Then as far the bread goes, you are only limited by your imagination. If you dig the crusty baguette go for it. For my gluten free friends this is a great opportunity to try some of the really great gluten free crackers, I have had some great ones. You could even slice cucumbers just like a loaf of bread and use that. Whatever makes you happy! I recommend you serve this with a nice glass of wine and just enjoy the freshness of summer!

Saturday, June 4, 2011

Rice Rolls


It is reaching up over 100 degrees today in Phoenix, so I am not wanting to eat something hot for lunch. In the summer I would much rather just eat watermelon all day everyday but I love food way too much to do that. This recipe is an inspiration from my younger sister, she makes a version of these for her family. The beauty of this recipe is that once you get your technique down on rolling them up you can fill them with anything! You will quickly become a Rice Roll master, you are only limited by your imagination. I am thinking about putting fruit in them next time. You could even make a desert one with Berry's and mint or something fun! The rice paper can be found at most normal grocery stores, if your does not have them go to Whole Foods they will have them for sure!

Ingredients
Rice Paper Rolls
1 Avocado
1 cucumber
1 block of tofu - any kind you like
1 carrot
3 green onions
(any other stuff you may want to put in)


Directions
  • in a pan big enough to put the rice paper sheets in put about 1 inch of water and bring to a boil
  • prep all your fillings so they are cut log and thin
  • when the water comes to a boil  place one rice paper sheet in until it turns soft, I flipped them over I would say 45 seconds per side.

  • remove from the water and lay flat on a plate, let it cool for a second
  • then place your fillings in the center and wrap up like a burrito

  • let cool and keep this process up until you have made as many as you want
  • dip in soy sauce or dressing or whatever you want!
Does anyone have any other great ideas for rice paper wraps ?

Thursday, June 2, 2011

Almond Butter Cups


I have not been good about posting lately, I am finding it hard to cook and take pictures, I will work on that. I really like this recipe, it is the time of year for summer party's and this is a perfect dessert to bring to any party. This is my version of a really great recipe that I have made a hundred times from The Kind Life book. In the book the recipe is for peanut butter cups and has different ingredients, but the same general idea. these cups are so rich! next time I think I will make them in a mini muffin form.


Ingredients
2 cups - Cat Cookies (for people) Trader Joe's brand
1/2 cup - Earth Balance
3/4 cup - Almond Butter
1/4 cup - raw sugar
1 bag - Chocolate Chips (dark or whatever kind you want, be sure it is vegan)
1/2 cup any nut milk you have on hand
about 1 cup of whole raw almonds for your garnish

Directions
  • Line muffin pan with paper cups (makes 12)
  • put the Cat Cookies in the Food Processor, zip them up till the are in little pieces (like making a graham cracker crust)
  • melt the earth balance (I did this in the microwave its too hot to turn on the oven in phoenix)
  • mix together the melted earth balance, cat cookies, almond butter, and sugar.
  • once this is combined divide the mixture between your 12 muffin cups
  • melt the chocolate chips and the nut milk together
  • divide the melted chocolate between your 12 muffin cups
  • garnish the tops with the raw almonds and a sprinkle of raw sugar
  • place in the freezer until frozen.

I like to leave these in a Ziploc in the freezer. when you are ready to eat just pull off the paper and go for it. I will tell you these are really rich, so I may make them as minis next time.