Pages

Sunday, July 10, 2011

Sunny Dill Cheeze and School

I am so excited to start school on Monday, oh wow that tomorrow morning! I am embarking on a journey to become a Holistic Wellness Counselor, I am attending school through the Institute for Integrative Nutrition. I am looking forward to learning and absorbing everything so that I can help others in there journey.
     One of the things I have always had an interest in is Raw eating, I have taken some classes and met some very brilliant people that are experts on Raw food. So in my own personal voyage to learn more about "cooking" Raw I am starting small with dips like this Cheeze spread. I am a really big fan of cashew cheeze (I make it often) so I was excited you use that same method with a summertime staple, Sunflower seeds! This version can be morphed to any ingredients you have on hand, you could change out the seeds for any other seeds or nuts. also you can change out the dill for what ever fresh herb you have, I love Thyme and Basil as well.

                                          I served it here as a spread on crackers with cucumber
Ingredients:

1 cup raw unsalted sunflower seeds
2 cups water
1 lemon juiced
1 table spoon fresh chopped dill
S&P to taste

First soak the sunflower seeds in the water for at least one hour.  After the seeds have soaked strain them and save the soaking water. Put the seeds in your food processor, add the juice of one lemon and let her rip, slowly stream in the soaking liquid until you get a smooth consistency (think natural peanut butter) then add your dill and S&P and pulse the food processor until it gets combined. Place the mixture in a glass jar and store in the fridge. I like to let it chill for about 30 min then place it on your favorite cracker or on a cucumber slab! There are some really wonderful Raw crackers at your local Whole Foods, in fact did you know they have a Raw food section? Next time you are doing some shopping check it out! Or as always check your local farmers market for a Raw vendor and make them your new BFF.
How about you? Have you had any experience with Raw eating? Want to learn more? Look around for a free class in your area, they are not as hard to find as you may think!

Bruschetta and Summer

Sometime is in full swing here is Phoenix, it is so hot and my desire to turn on the oven is not happening. I want to focus this summer on using more raw and fresh ingredients. It feels like the body's natural desire is to have cooler foods in the summer, less effort to process and eating raw is a super nutritious way of eating. I am not saying this is a raw dish but there will be some raw food to come on my blog. For now I am just so excited about this Bruschetta, I love bread!!!  I will find any excuse to buy a beautiful fresh loaf of crusty goodness. The other day at the store I got some really great looking cherry tomato's, I thought that the little bites of bright freshness would be perfect for this dish. Yes this is a quite simple dish but I am struck with the punch of flavor and the simplicity of fresh ingredients, I made this a meal with a glass of wine. This is a great dish to make ahead and take to party's, picnics or just to have on hand for a few days to snack on (if it lasts that long)


Bruschetta
2 cups chopped fresh Tomato's (i used cherry's for this one but use any great looking cherry at your market)
2 large cloves of fresh garlic chopped
15 fresh basil leaves chopped
1/2 cup to 1/3 cup really good olive oil
1 table spoon of Balsamic Vinegar
S&P to taste (as always I go heavy on the pepper)

I may have gone heavy on the garlic but you can back off if you don't want garlic breath.


That's it, toss it all in a bowl and mix, I like to let it sit in the fridge for 30 min or so to let all the flavors mix and get friendly. Then as far the bread goes, you are only limited by your imagination. If you dig the crusty baguette go for it. For my gluten free friends this is a great opportunity to try some of the really great gluten free crackers, I have had some great ones. You could even slice cucumbers just like a loaf of bread and use that. Whatever makes you happy! I recommend you serve this with a nice glass of wine and just enjoy the freshness of summer!

Saturday, June 4, 2011

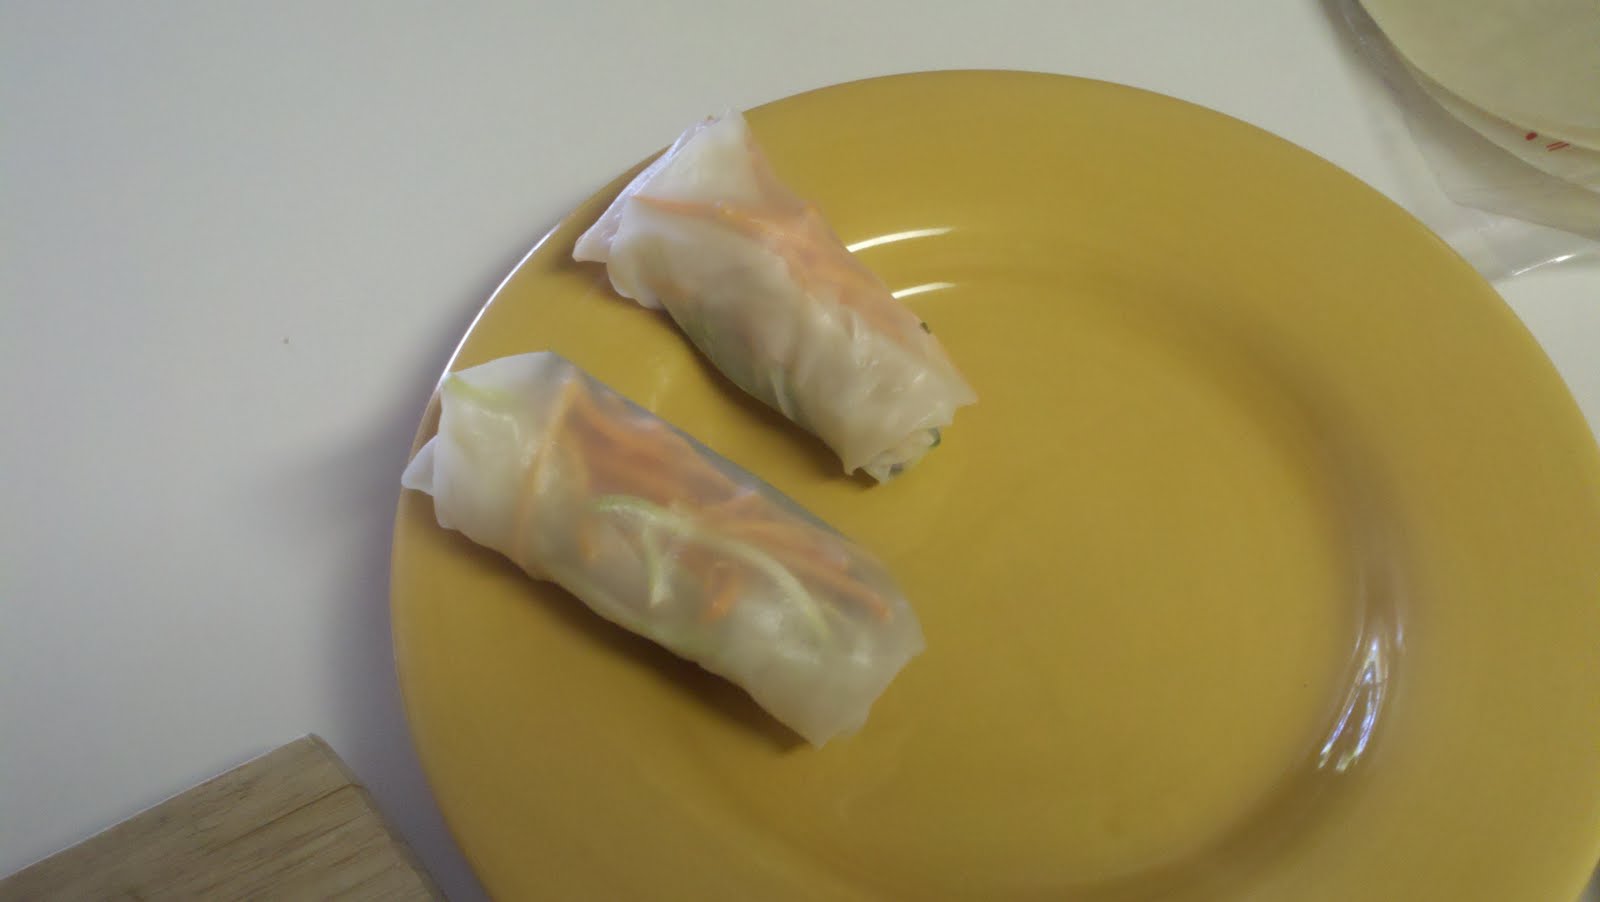
Rice Rolls


It is reaching up over 100 degrees today in Phoenix, so I am not wanting to eat something hot for lunch. In the summer I would much rather just eat watermelon all day everyday but I love food way too much to do that. This recipe is an inspiration from my younger sister, she makes a version of these for her family. The beauty of this recipe is that once you get your technique down on rolling them up you can fill them with anything! You will quickly become a Rice Roll master, you are only limited by your imagination. I am thinking about putting fruit in them next time. You could even make a desert one with Berry's and mint or something fun! The rice paper can be found at most normal grocery stores, if your does not have them go to Whole Foods they will have them for sure!

Ingredients
Rice Paper Rolls
1 Avocado
1 cucumber
1 block of tofu - any kind you like
1 carrot
3 green onions
(any other stuff you may want to put in)


Directions
  • in a pan big enough to put the rice paper sheets in put about 1 inch of water and bring to a boil
  • prep all your fillings so they are cut log and thin
  • when the water comes to a boil  place one rice paper sheet in until it turns soft, I flipped them over I would say 45 seconds per side.

  • remove from the water and lay flat on a plate, let it cool for a second
  • then place your fillings in the center and wrap up like a burrito

  • let cool and keep this process up until you have made as many as you want
  • dip in soy sauce or dressing or whatever you want!
Does anyone have any other great ideas for rice paper wraps ?

Thursday, June 2, 2011

Almond Butter Cups


I have not been good about posting lately, I am finding it hard to cook and take pictures, I will work on that. I really like this recipe, it is the time of year for summer party's and this is a perfect dessert to bring to any party. This is my version of a really great recipe that I have made a hundred times from The Kind Life book. In the book the recipe is for peanut butter cups and has different ingredients, but the same general idea. these cups are so rich! next time I think I will make them in a mini muffin form.


Ingredients
2 cups - Cat Cookies (for people) Trader Joe's brand
1/2 cup - Earth Balance
3/4 cup - Almond Butter
1/4 cup - raw sugar
1 bag - Chocolate Chips (dark or whatever kind you want, be sure it is vegan)
1/2 cup any nut milk you have on hand
about 1 cup of whole raw almonds for your garnish

Directions
  • Line muffin pan with paper cups (makes 12)
  • put the Cat Cookies in the Food Processor, zip them up till the are in little pieces (like making a graham cracker crust)
  • melt the earth balance (I did this in the microwave its too hot to turn on the oven in phoenix)
  • mix together the melted earth balance, cat cookies, almond butter, and sugar.
  • once this is combined divide the mixture between your 12 muffin cups
  • melt the chocolate chips and the nut milk together
  • divide the melted chocolate between your 12 muffin cups
  • garnish the tops with the raw almonds and a sprinkle of raw sugar
  • place in the freezer until frozen.

I like to leave these in a Ziploc in the freezer. when you are ready to eat just pull off the paper and go for it. I will tell you these are really rich, so I may make them as minis next time.

Thursday, May 19, 2011

Chewy Ginger Cookies


Because Gingers Totally ROCK!  :)

This is my take on a great recipe out of a really wonderful book! The Vegan Cookie Connoisseur. Check it out! It was chilly here today so I wanted a spicy warm cookie for desert! ENJOY!


Ingredients
3/4 cup Brown Sugar
1/4 cup Sugar
1/2 teaspoon vanilla extract
3 tablespoons Dark Molasses
1/3 cup Canola Oil
1/3 cup Almond Milk
1 3/4 cup Flour
1 teaspoon Baking soda
3 teaspoons Ground Ginger
1/2 teaspoon Cinnamon
1/2 cup Turbinado Sugar (to roll the dough balls in)

Directions
Pre-Heat the oven to 350
mix all the wet ingredients
sift in the dry ingredients
mix together thoroughly
roll into balls and dip in the Turibando Sugar
bake for 12-15 min


ENJOY

Tuesday, May 17, 2011

Vietnamese Rice Noodle Salad with Crispy Tofu

Vietnamese Rice Noodle Salad with Crispy Tofu
                                               A big thank you to my foodie photo taker :)
Dressing
·         3 tablespoons chili-garlic sauce

·         1 tablespoon soy sauce

·         1/4 cup fresh lime juice (about 2 depending on how juicy your limes are)


Salad
·         1 (12 ounce) package extra firm tofu
  • ½ cup soy sauce
  • 1 (8 ounce) package thin rice noodles
  • 1 medium cucumber, sliced in thin half moons
  • 1 small red onion, thinly sliced  
  • 1 cup julienned carrots
  • 2 cups mixed greens
  • 1/4 cup thinly sliced cilantro
  • 3 tablespoons of veggie oil

Topping
·         1/4 cup peanuts, chopped

·         3 tablespoons finely chopped cilantro

·         zest of 1 lime

Directions
1.      Mix up the dressing, Just add all the ingredients into a jar, put on the lid and give it a shake
2.      Pour the ½ cup of soy sauce into a shallow dish, cut the tofu into planks, let the tofu marinade in the soy for however long it takes you to do the next few steps (don’t forget to flip them)
3.      Cook the rice noodles according to the package then place them in the fried to cool off
4.      Slice the cucumber, red onions and carrots, prepare the greens and slice the cilantro.
5.      Now being to heat a pan over medium/high heat with the oil.
6.      When the oil becomes hot, add in the tofu and fry them on both sides until crispy, then drain them on your brown bag (doesn’t recycling feel good)
7.      Time to build the salad, now make a bed with the greens and top that with the noodles and the remainder of the veggies, then sprinkle the topping on.
8.      Serve the tofu and dressing on the side.

That’s it, it took me about 30 minutes and dinner was on the table, the tofu was crispy and delicious. This cold salad was perfect for a summer dinner and made a mountain of food so a great potluck dish! I may have to bring this to the next book club. J As always let me know if you have any questions or suggestions! Don’t forget to spread the Vegan Yogi love and tell your friends about this yummy blog!


Friday, May 13, 2011

Artichoke Season

                  
I Love this time of year because there is always amazing food fresh from the earth, One I am particularly fond of is Artichokes! I love this little thistle, but if you want to cook them fast and eat them fast then you really need to take a lesson from my mom. Yes most people boil them but that can take over an hour to do. My very smart mother taught me the best way ever. Give this a try, you can find huge artichokes at super low prices right now at Whole Foods and Trader Joe's.

Prep
Cut off the stem
cut off the top
trim the points off of each leaf using a kitchen scissor
open the top a little and run the choke under some water (they are grown in the sand so this will take care of any sand that hitched a ride)

Cooking
Place the chokes in a microwave safe bowl and fill it with about 1 inch of water
now top with plastic wrap and pop it in the microwave
you want to do 3-4 min per choke if they are big (like softball size)
just check them by opening the plastic wrap and tyring to pull out a leaf, if they come off easy they are done
I use tongs and flip them over and squeeze and extra water out

EAT
I like to serve these little green gems with melted Earth Balance or...... Vegan Mayo!!! I know but it is sooo good.

Well I hope you enjoy some of the great veg this time of year has to bring! Let me know what Veg you are enjoying this time of year too!